Registering your application in the Wych Recipient portal creates the software product used to access the platform. This is where you define the product details your organisation will use, manage team access, and retrieve the credentials and links needed for integration.
AU CDRNZ PNZBefore you start
Before creating a software product, make sure you have:
- a user account for the Wych portal
- access to the correct business
- any additional team members ready to invite
- your product name, description, URL and privacy policy URL
- links to your API documentation and product guides, where available
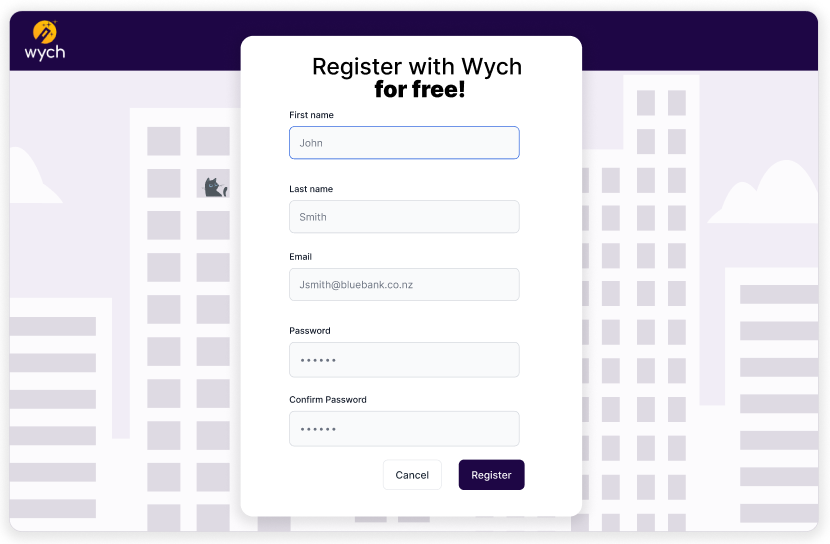
Step 1: Register and sign in
New users can create an account from the registration page by entering their first name, last name, email address and password.
Once your account has been created, sign in using your email address and password.
After signing in, you will be taken into the portal where you can begin setting up your business and software product.
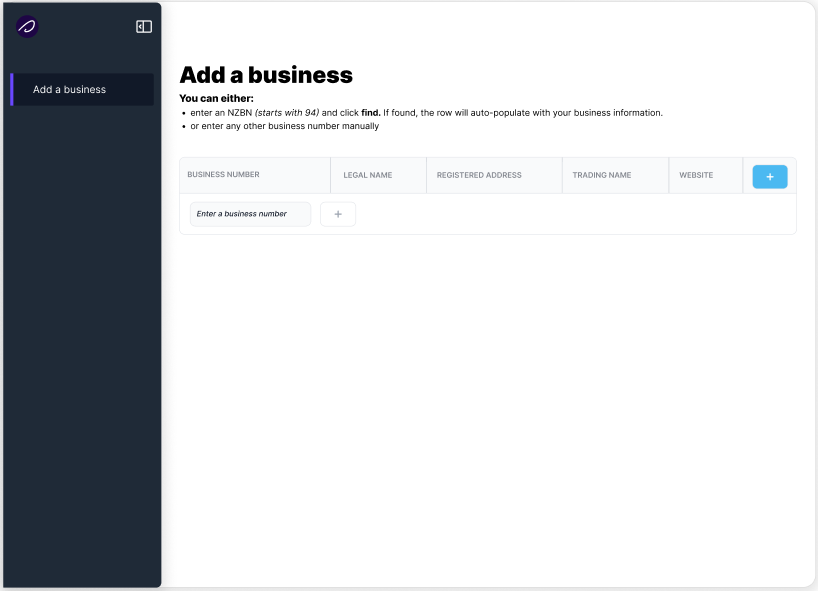
Step 2: Add your business
From the portal, select Add a business.
You can enter either:
- an NZBN, then select Find
- another business number manually
If the business is found, the portal will populate the business details for you. The business is then added to your workspace and becomes the container for your software products and users.
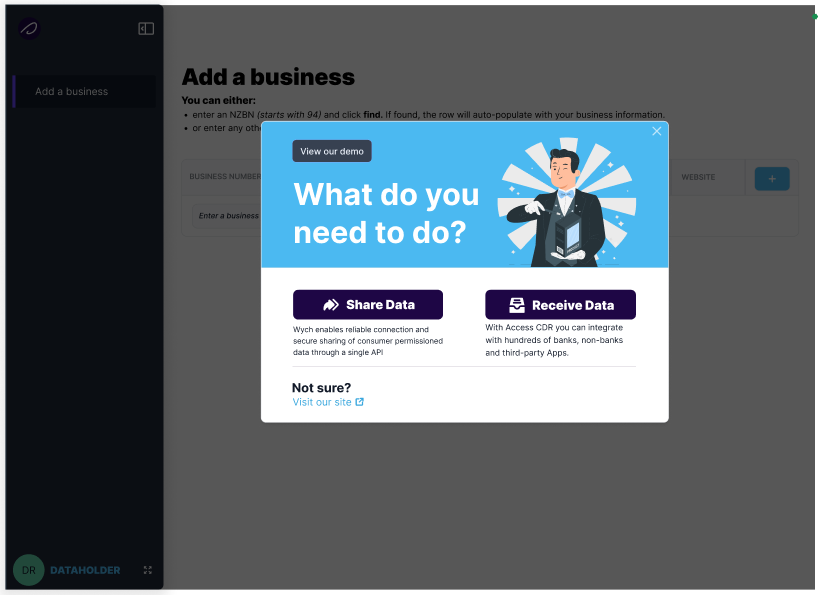
Step 3: Choose how you want to use the platform
After adding your business, a setup modal is displayed asking what you want to do next.
The two options shown are:
-
Share Data
Use this option where you want to enable secure connection and data sharing for a business or customer through a single API. -
Receive Data
Use this option where your software product will connect to banks, non-banks or third-party providers to receive consumer-permissioned data.
For a Recipient software product, choose Receive Data.
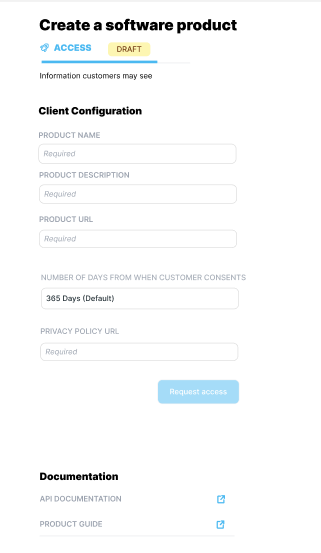
Step 4: Create a software product
Navigate to Software products and select Create new product.
The create screen captures the core product information customers may see. Enter the following client configuration details:
- Product name
- Product description
- Product URL
- Number of days from when customer consents
- Privacy policy URL
Once complete, submit the form to request access and create the software product.
Step 5: Review the software product record
After creation, the software product appears in your software product list.
Open the product to review its details. The product page shows:
- product configuration information
- current product type, such as Access
- current product status, such as Draft or Active
- product details including technical identifiers and credentials
- documentation links
Once the product has been enabled, the page will also display the integration values needed by your application, including:
- JWKS URI
- Client ID
- Client Secret
Treat the client secret as sensitive and store it securely.
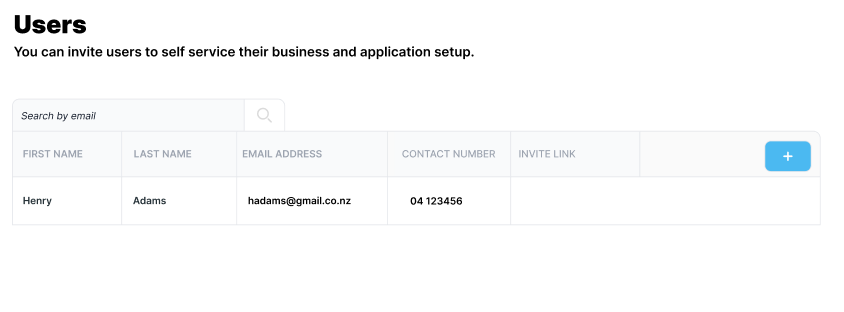
Step 6: Invite product and business users
From the Users page, you can invite administrators and team members to help manage business and application setup.
To add a user:
- Select the add button on the users page.
- Enter the user's first name, last name, email address and contact number.
- Save the record.
- Send the invite.
After the invitation has been sent, the user appears in the team list with an invite link and status.
Use this page to manage who can self-service business and application setup within your organisation.
Product lifecycle
A software product typically progresses through the following states:
- Draft
- The product has been created but is not yet active. At this stage you can complete the configuration, branding, invite team members and review documentation.
- Active
- The product is enabled and ready for use. At this point the portal displays the technical details required for integration, such as the JWKS URI, client ID and client secret.
What to do next
Once your Recipient software product is active:
- capture the issued credentials and endpoints
- configure your application to use the product
- confirm your JWKS is available at the configured URI
- complete any remaining portal configuration such as branding
- move on to the Recipient integration and consent setup guides